

- We recommended using transparent embossing powders when using colored inks & clear inks (such as Emboss, VersaMark or Emboss Pen Clear) when using opaque embossing powders.
- When embossing use plenty of powder. Dust off stray powder with a brush and pour the excess into bottle for future use.
- Stamped images on non-porous surfaces may rub off if handled repeatedly.
An embossing heat gun is the recommended heat source for use with Emboss powders.
Stamp image using a slow drying pigment ink (VersaColor, VersaMark, etc.) Sprinkle embossing powder on image and shake / brush off excess powder. Carefully apply heat via an embossing heat gun or other heat source until the powder melts. The surface will become glossy as the design rises. Melted powder is water resistant – great for use with watercolor markers or paints. With VersaMark (or VersaMark Dazzle) and clear embossing powder, you can create an elegant translucent embossed image on colored papers.
- Textiles are not suitable for embossing as embossed image.
- A hair dryer is not a suitable heat source as the temperature is too low and the air flow is too strong.
To emboss you will need:
A stamp, ink or embossing marker, a surface to apply image (paper), a fine brush and a heat source (embossing heat gun, toaster oven or iron.)
Steps for Embossing see below for more information on embossing.
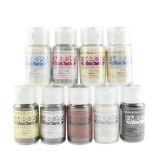
Opaque types:
Gold (gold metallic matte), silver (silver metallic matte), copper (copper metallic matte).
White
Step 1
Opaque (Gold, Silver, Copper, White):
Stamp with Emboss or VersaMark, apply embossing powder and heat. We recommend using the same color ink and embossing powder for the truest color results.
Step 2
Immediately sprinkle powder onto stamped image. Apply liberally so that powder adheres evenly.
*Hint: placing your work on top of a larger piece of paper with a folded crease makes easy work of gathering and returning excess powder to the bottle.
Step 3
Sprinkle powder evenly onto design and gently shake or brush off excess powder.
Step 4
Return excess powder to bottle, careful to not mix in any dirt or dust. If you are embossing multiple designs, you can dispense powder into a shallow tray and bring the paper / stamped image to the powder. Act quickly and apply powder liberally while ink is still wet.
Be careful not to overheat or burn the embossing powder.
Step 5
Use an embossing heat gun to melt powder. When using a toaster oven, hold the paper with tweezers and heat until powder melts. When heating with an iron, stand the iron up, hold the paper with tweezers and heat the paper from the back (do not allow iron to touch paper.)
●Use caution when applying heat. Heat sources can cause burns.
Clear types:
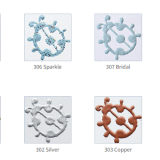
Clear (transparent), Sparkle (clear with silver glitter – best with dark colored inks), Bridal (pastel pearl with crystal lamé) and Pearl(pastel pearl)
Clear types (Clear, Sparkle, Bridal, Pearl):
Step 6
Use colored inks with clear embossing powders on light colored papers. Clear inks can be embossed with clear embossing powders on colored papers for a two tone effect. Use plenty of ink and apply a liberal amount of powder.
Apply heat.
Step 7
If you are embossing multiple designs, you can dispense powder into a shallow tray and bring the paper / stamped image to the powder. Act quickly and apply powder liberally while ink is still wet.
Take care not to overheat or burn the embossing powder.
Reviews
There are no reviews yet