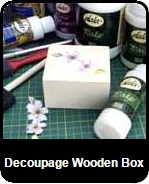
| DECOUPAGE WOODEN BOX |
 EQUIPMENT: EQUIPMENT:
Cutting Knife (scalpel type, revolving blade best) CREATING LIQUID GLASS SAMPLES STEP BY STEP
GENERAL INFORMATION Preparing & Fill holes or dents with some wood filler & leave to dry. Painting the Sand the wooden blank with 400 grit sandpaper till smooth Wooden Blank to the touch. Wipe with a damp cloth to remove all dust. Paint with a layer of white Craft Paint & leave to dry. When dry, sand again, using 400grit paper. Wipe with a damp cloth again. Apply Craft Paint in a selected colour for the background. (Different colours have different covering strength.) Allow any layers to dry before applying additional coats. Cutting the Cut out the rough shape of the image from a sheet of paper. Paper which makes it easier to handle. First cut out hard to reach inside bits. A sharp craft knife and cutting mat are ideal for this. (If it is very flimsy, a coat or two of Podge would help strengthen it.) When using a craft knife, cut away from the picture (if it slips it will not cut into your image.) Use the small sharp scissors to cut out the other areas. Manipulate the paper and keep the scissors steady, using only a cutting motion. Make sure that all background bits are eliminated as they would detract from the finished product. Glueing the Coat the back of the picture with Podge. Dont be shy, Picture use sufficient. Apply a layer of Podge to the blank where the image will be placed. Place the image in position. Wet a finger with Podge and smooth out all the trapped air and excess Podge beneath the image. Work from the centre to the outer edges. Once the image is smooth, the whole area is painted with layer after layer of Podge. It will appear milky at first, but will dry clear. Constantly work with different directions of application. north to south, east to west, south to north, etc. Allow each layer to dry before the next is applied. (Length of drying time will depend on the weather, how thick it was applied, etc. No hard & fast rule.) Continue till about 10 layers have been applied. When completely dry use 600grit wet waterpaper, and ‘wet sand’, using an up and down rather than a circular motion. Sand till smooth to the touch, keeping the paper wet all the time. Apply 10 or so more layers of Podge in the same way and then sand again. Repeat until your image is smoothed beneath about at least 30 layers of Podge. To be effective, no ridges from the pasted image must remain. The aim is to ‘trick the eye’ (and the fingers) to believe the image has been painted or inlaid. Leave to dry overnight. Now use the 800grit paper (finer) & wet sand until no shiny areas are visible. Leave to dry for 12 hours. Finally wet sand with the 1000grit paper to smooth the surface, and wipe using clean water. Leave to dry for 24 hours. Varnish (Dala Dead Flat, Dala Gloss, or Dala Heat Resistant Varnish) and leave to dry. Always rinse the sponge applicator or paintbrush when you have finished using it. (If the Podge is left to harden on the sponge, it cannot be successfully removed.) When wet sanding, the dried Podge may appear milky, but it will dry clear again. If you are not sure about the strength of the imaged paper, test it as follows. Take a sample scrap of the paper and paint a little Podge onto it. If it wrinkles a little – no problem. If it wrinkles and curls a lot, it is advisable to stiffen it a little by applying a layer or two of Podge over the whole sheet, and leaving it to dry. Then cut out the image and proceed as normal. |